Creating delftblue ceramics
Are you curious about our production process? Then look no further. Here you can read about every step of the making of ceramics and Delft Blue.

Delft blue ceramics are a testament to the skill and dedication of artisans. The process of transforming raw clay into exquisite pieces involves several meticulous steps, each contributing to the final product's beauty and quality.
The journey begins with slipcasting, a technique that allows for the creation of complex shapes and designs. In this process, liquid clay, known as slip, is poured into plaster molds. The plaster absorbs moisture from the slip, forming a solid layer of clay against the mold's interior. After a specified time, the excess slip is poured out, leaving behind a hollow form that will eventually be refined into a finished piece.
Once the slipcasting is complete, the next step is glazing. This involves applying a glass-like coating to the ceramic surface, which not only enhances the aesthetic appeal but also provides a protective layer. The glazing process requires precision, as the thickness and evenness of the glaze can significantly affect the final appearance and durability of the ceramic.
Firing is a critical stage in the production of Delft blue ceramics. The pieces are placed in a kiln and subjected to high temperatures, typically ranging from 1,000 to 1,200 degrees Celsius. This process not only solidifies the clay but also causes the glaze to melt and fuse to the ceramic body, resulting in a smooth and glossy finish. The firing process is often repeated, especially when multiple layers of glaze or decoration are applied, ensuring that each piece meets the highest standards of quality.
The final and perhaps most distinctive step in creating Delft blue ceramics is delftpainting. This technique involves hand-painting intricate designs onto the glazed surface using cobalt blue pigments. The artistry displayed in this phase is a hallmark of Delft blue ceramics, with motifs often inspired by traditional Dutch floral patterns, landscapes, and historical scenes. Each piece is unique, reflecting the individual craftsmanship of the artisan.
In conclusion, the creation of Delft blue ceramics is a complex and labor-intensive process that showcases the remarkable skills of artisans. From slipcasting to glazing, firing, and delftpainting, each step is essential in producing the stunning pieces that have become synonymous with Dutch heritage. Understanding this craftsmanship not only enhances appreciation for these ceramics but also highlights the cultural significance embedded in each handmade item.
Are you curious about our production process? Then look no further. Here you can read about every step of the making of ceramics and Delft Blue.

It all starts off from a mold. For each ceramic item, each shape there has to be a master mold. This master mold, made of gypsum or plaster, is a model in the equivalent shape of the product itself . Out of this master mold are cast renewable negative moulds, the so-called production or working plastermolds, In these eventually liquid clay is cast to obtain the ceramic. For some shaped clay throwing is used instead of claycasting, mainly for our delftplates and florist pottery. For more information on how we make our delftware pottery just ask us.
Still before casting the clay in the mold we need to make liquid clay, clayslip, The raw material comes in as dry powder, its all mixed to desired condition in a huge claysliptank, which you can see in the video above.
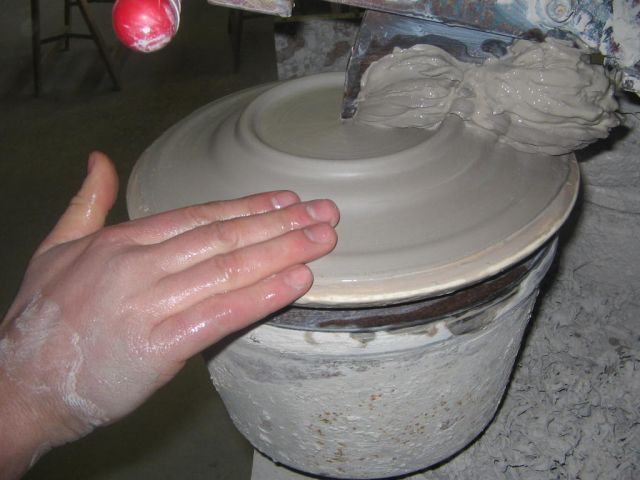
As mentioned the working moulds are filled with liquid clay. A part of the clay attaches itself to the inside of the plaster thus extruding the water and forming a clayslip crust. The remaining will be poured out. When the clay crust has dried the mould (which consist of several parts) can be opened. The product is taken out carefully. Subsequently the product is polished and finished. After this the clay is baked for the first time. Clay that has been fired once, is called ‘biscuit’. Biscuit is dry and still porous earthenware pottery, ready for underglaze decoration.
The Dutch artisanal ceramic of our serie ‘De Wit’ , named after a Dutch pottery from Gouda (1960-2000) are all entirely handpainted. There is a standard and a luxury authentic Delftware version. All other items belong to the Montagne Delft series; silkscreen patterns underglaze and partial printing on the biscuit like a logo with company name or a self made design. Then the product is glazed by way of dipping and spaying. Finally the delftpiece will be baked for a second time to become a shining delft masterpiece.
See more behind the scenes om instagram, for example this: Delft monster vase
The choice for method 1, 2 or 3 is made by our costumers in accordance with the quality needed, the quantity to be made and also with the delivery time
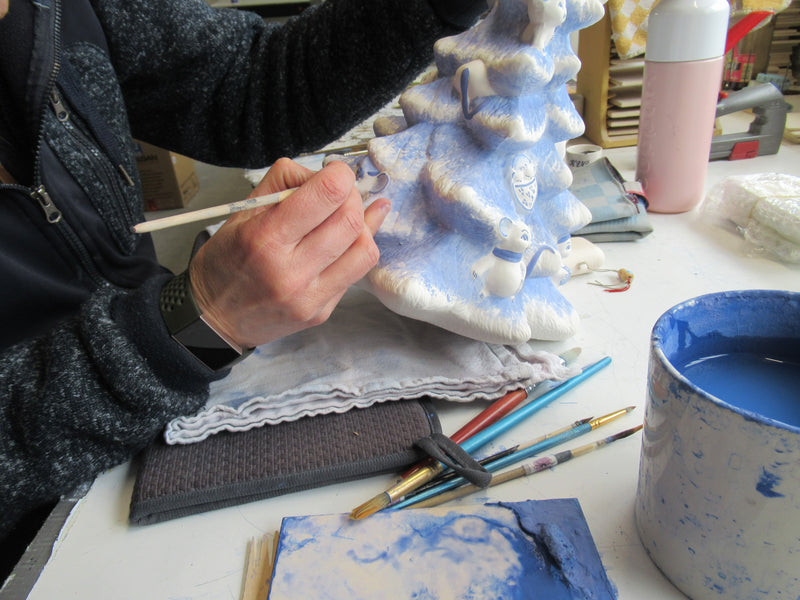
Obviously authentic delftware has to be entirely painted by hand, just like the delftplate above. That is easier said then done as for a really detailled and fine painting you need talented and experienced delftpainters and there arent very much of them. Our delftserie ``de Wit`` falls into this category and is marked with two crossed pencils and the painters initials at the back. Painting a portrait is often much more difficult as painting a building. On the other hand many of the decorative floral or landscape patterns are used so often that they have become a routine for the most painters . The painting is applied directly on the bisque, ( the clay or greenware that has alredy been fired) before the glazing takes place. That is why speak of underglaze paint and underglaze decorating.
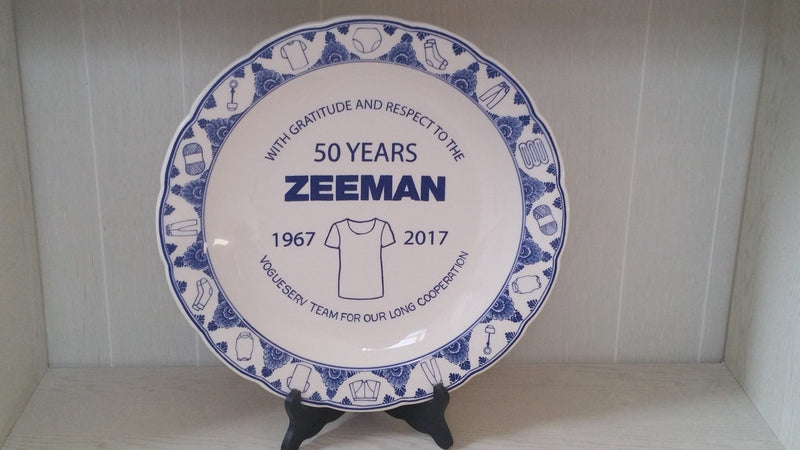
Above picture clearly shows that the builing has been printed. In this case directly on the bisque by using a silk screen. More details or shades can still be add by hand with a pencil as it is still without glaze. Only when the whole decorating is done, the glazing takes place by either spraying the glaze or submerging the item in a bath of liquid glaze. Then the second firing can begin.
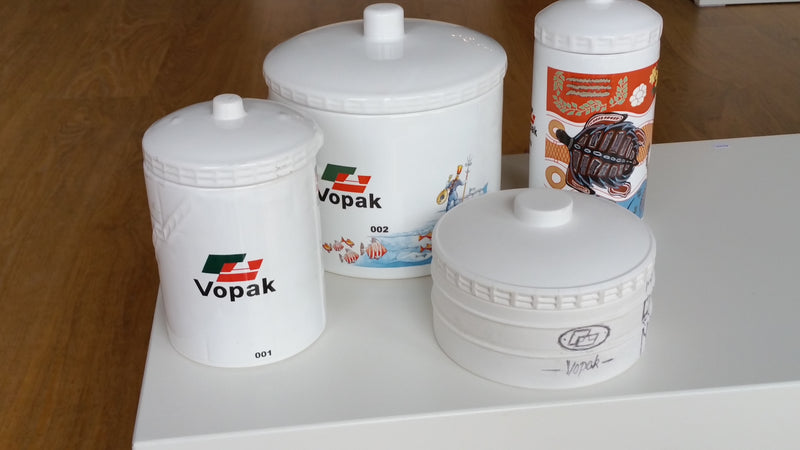
When using ceramic decalls, the design (above the F-35 JSF) is first printed onto special paper with a coating that allowes the design to glide off from the paper on to the ceramic object. This only works if the object has been glazed already (and thus after second firing) and needs to be fired for a third time in order for the decall to merge with the glaze. That is why we call this onglaze decorating using unplaze paint.
You can visit us at the factory any time, and if there is a special part of the process you wish to witness, please contact us.
0 Item(s)


